


Self-publishing can feel overwhelming, but it doesn’t have to be. Believe me: The steps to self-publish a book may be lengthy, but they’re not all that complicated if you know what to do and where to go.
Over the past 10 years, our coaches at Self-Publishing School have helped more than 8,000 students write, market, and successfully publish their books, and we’ve learned exactly what steps make the biggest difference.
No matter if you’re writing your very first book or you’re an experienced author ready to take full control of your publishing journey, having a clear, organized roadmap before you get going is the best step zero you can get. That’s why we put together this detailed checklist to walk you through every stage, based on what we’ve learned from teaching over 8,000 writers just like you.
Follow this guide, and you’ll not only publish your book, but you’ll also set yourself up for lasting success as an author.
Table of Contents
Do you want to self-publish?
There’s a lot to consider when it comes to the steps to self-publish a book. Do you even want to be doing it all?
It’s an exciting and empowering way to bring your book into the world without waiting for traditional gatekeepers. Whether you dream of building a career as an author, sharing your story, or creating a book to complement your business, self-publishing gives you full creative control.
But it also means you’re in charge of every step.
Which means it’s up to you to get it right…
And it’s on you if you get it wrong.
It might be worth checking out information about self-publishing or finding an agent and self-publishing VS traditional publishing to help you understand the true differences. This is a big decision. Not everyone is cut out for self-publishing just like not everyone will cut it going the traditional publishing route.
But if you’re here, it’s likely you’ve decided to self-publish.
Here are the detailed steps to self-publish a book that’ll get you there.
12 Steps to self-publish a book in all 5 stages
There are 5 distinct stages of self-publishing. Most people think you can upload a document and hit “publish.” If you want to do it well, and set yourself up for success, there’s a lot more the steps to self-publish a book.
1. Pre-writing
Before you even start the book, there are necessary steps that will help set you up for success from the beginning. Without these, you’ll flounder, have many half-drafts, and never finish. When we work with students, this is the cycle most of them have repeated.
The one we help them break.
Step 1: Define your goal and audience
Before you write a single word, clarify why you’re writing your book and who it’s for. Is your goal to entertain, educate, or inspire? Knowing your audience and your purpose will shape every decision you make throughout the steps to self-publish a book.
Write a one-sentence mission statement for your book.
Example: “Help beginner entrepreneurs start their first online business with no prior experience.”
Ask yourself:
- Why am I writing this? (income, authority, storytelling, passion project?)
- Who will find this book helpful or entertaining? (age, interests, lifestyle?)
The more specific you are, the better your book will connect with readers. Remember, you want to be targeted. It’s your target audience, after all. Don’t try to speak to everyone. You’ll end up speaking to no one in that case.
Step 2: Develop your book idea and outline
A strong outline is the foundation of a focused, organized book. Spend time brainstorming your main ideas, chapters, and key points. Even fiction benefits from plotting major story beats in advance. If you want to make your book feel more cohesive, this is one of the steps to self-publish a book you won’t want to skip.
Start with a brain dump. Set a timer for 20 minutes and list every idea that comes to mind around your topic or story.
Organize ideas into a rough structure:
- For nonfiction: Break into chapters covering key concepts.
- For fiction: Map major story arcs (beginning, conflict, climax, resolution).
Outlining doesn’t have to be rigid—think of it as a flexible roadmap. And if you think you’re more the freewriting versus outlining type, at least have a general sense of the sections of your book. A mindmap is the minimum even for free writers.
Here are a couple examples to get you thinking:


You can free-structure your outline, but if you want something that’ll make this process a lot easier, here’s a free outline template:


Book Outline Generator
Choose your Fiction or Nonfiction book type below to get your free chapter by chapter outline!
Book Outline Generator
Enter your details below and get your pre-formatted outline in your inbox and start writing today!
CONGRATULATIONS
Thanks for submitting! Check your email for your book outline template.
In the meantime, check out our Book Outline Challenge.

Step 3: Plan your timeline and resources
Self-publishing requires juggling multiple roles, so setting a timeline is crucial. Map out milestones for writing, editing, production, and launch. Identify resources you’ll need, like an editor, cover designer, or formatting tools. Set your writing goals!
Work backwards from your ideal launch date and build a realistic timeline.
Here are a couple things to think about:
- How much time can you dedicate each week?
- Do you need to budget for editors, cover designers, marketing tools?
- Will you need beta readers? ARC reviewers? A formatter?
Write down major deadlines like: First draft complete, Send to editor, Upload files, Launch day.
Stick these in places you’ll see them daily! Momentum is one of the biggest factors when it comes to whether or not you finish writing your book. While these steps to self-publish a book are extensive, the writing will feel like the most important part, because it is.
2. Writing
Most people like this stage the best. Writing is fun—for most of us! If it’s not your favorite and you can afford it, ghostwriting is always an option. That said, it’s very important part of the steps to self-publish a book.
Step 4: Write the first draft
Commit to getting your first draft down without over-editing yourself. Allow room for messy creativity—you can refine later. Set a regular writing schedule to keep up momentum. Momentum, again, is key!
Set daily or weekly word count goals (500–1000 words/day is manageable for many) and will get you to a finished (nonfiction, at least) draft in a month.
If you find yourself struggling to get it finished, here are a few tips:
- Focus on progress over perfection. Getting it down before you get it right.
- Use tools like Scrivener or Google Docs to organize large drafts easily. You can even grab our book outline template to make it a bit easier (it’s in Google Docs).
- Join writing sprints or challenges (like NaNoWriMo) for accountability. Communities are also really strong for accountability.
Bottom line: one of the hardest steps to self-publish a book is actually finishing the first draft. Focus, and get it done.
Step 5: Revise and self-edit
After finishing your draft, step away for a week or two before editing. Fresh eyes spot problems better. That way your brain won’t be automatically filling in any typos with what you think you wrote. Of the steps to self-publish a book, most people hate this one the most.
Typically, revising is done in a few rounds, not just in one go.
Here’s an example of the rounds to edit in:
- First round edits: Structure, flow, missing sections. This is for for larger updates that’ll take more time.
- Second round edits: Sentence-level polish, style, voice.
- Third round: Grammar, typos, formatting quirks.
- Use tools like Grammarly, Hemingway App, ProWritingAid or AI models, but don’t rely on them alone.
If you write in a place like Google Docs, you can even make notes in the manuscript for later—or while you’re writing, so you don’t disrupt your flow. All you have to do is highlight the text you need to make note of, and insert a comma (Command + Option + M on mac). It’ll show up very obvious for editing, like this:

Self-editing is harder than it seems. Being able to spot issues yourself isn’t as easy as reading something someone else wrote.
Which is why we highly recommend the next step.
Step 6: Hire a professional editor
Look for an editor experienced in your genre, and ask for sample edits first. It can be tough to find a good editor, but it’s one of the steps to self-publish a book that can make the biggest difference.
You aren’t able to clearly see your book. It’s impossible. But an editor can help you write the book you intend to without your own filter clouding what it could be. Depending on your own skill level, what you can afford, and your goals, there are a few types of editing to consider:
Here are the types of editing you might need:
- Developmental editing: big picture help: plot, structure, clarity. This will break down genre, subgenre, and help you understand the overall construction of your book on a chapter by chapter, section by section basis.
- Line editing: improving the flow, tone, word choice. This will make your writing sound better not just in single sentences, but how it sounds together—the rhythm.
- Copyediting: grammar, punctuation, consistency. This is more of the nuts and bolts. It’ll check for consistency in number formatting, what you capitalize and what you don’t, which versions of words you use (when multiple types are acceptable—like toward vs towards).
Overall, a professional edit can take your book from “good” to “outstanding”. Among the steps to self-publish a book, this is often the most skipped. Don’t skip it! You will regret it later.
3. Book production
This stage contains the steps to self-publish a book that actually create the book itself. Up until this point, it’s just floating on the computer, waiting to become a physical book.
If you’re doing this yourself, you need to know the details.
If you’d rather someone else handle this, joining a program like selfpublishing.com can ensure this is all done to the best quality while you can stay focused on the writing itself.
Step 7: Cover design
Your cover is your book’s first impression. Readers absolutely judge a book by it. Not only that, but just like there are genre expectations for the content of your book, there are also expectations for the cover. Meaning your book cover should follow a certain set of rules given its genre and audience.
Here’s a really easy example to see based on books in the romance genre, but within different subgenres.
Romantic comedy covers:


Romance thrillers:


All of these books are romances. But you can clearly see that they’re for different audiences based on the type of romance. A good cover designer will understand the nuances.
Here are a few things to think about when it comes to your book cover design:
- Hire a professional cover designer who understands both visual appeal and genre-specific expectations.
- Make sure your designer creates:
- A high-resolution ebook cover (usually JPEG or PNG).
- A full-wrap cover for print (front, back, and spine) if you plan to publish a paperback or hardcover.
- If you’re on a budget, use pre-made cover sites or templates on Canva—but only if you’re confident it still looks professional.
Here are a few more tips for making a good cover:
- Eye-catching thumbnail (looks good small!)
- Clear title and author name
- Genre-appropriate style
- Visually appealing color scheme
- Strong typography (readable, not cluttered—remember, people will shop for a book on their small phones)
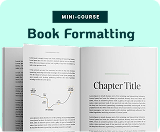
Step 8: Formatting & interior design
A beautiful book interior makes a huge difference in how professional your book feels. Sloppy formatting can distract readers—and result in poor reviews. Readers can get a preview of your book through the “read sample” feature on Amazon.
Just imagine the difference in feeling of opening a book to plain white pages versus opening a book to something like this (done by Ida Fia Sveningsson):


Now the above example is more in the realm of book interior design and not just formatting. Formatting alone has less special visuals and is more standard. Every book needs to be formatted for various book types, but interior design is optional and something extra.
Formatting includes:
- Chapter headings
- Font choices and sizes (typesetting—it does matter)
- Margins, line spacing, and indentation
- Page numbers, headers, footers
- Front matter (title page, copyright, dedication) and back matter (about the author, other works, call to action)
If you want to go about this yourself, here are tools that can help:
- Vellum (Mac) — easy drag-and-drop formatting for both print and ebook
- Atticus (Windows and Mac) — newer, cross-platform alternative
- Reedsy Book Editor — free online tool
Alternatively, hire a professional formatter if you’re feeling overwhelmed or need special design elements like chapter art, fancy drop caps, or custom fonts for specific effects (especially important for nonfiction, workbooks, or illustrated books).
Step 9: Acquiring proper document formats
Each publishing platform has different file requirements. Which means preparing your files correctly prevents technical delays during launch. If a certain file type isn’t correct, you could get a notification to fix prior to launch. Or it might work, but then you’ll have display issues which is a major problem for book reviews.
This is one of the steps to self-publish a book that’s crucial to get right but often overlooked.
For ebooks:
- Most platforms (Amazon KDP, Apple Books, Kobo) require ePub files.
- Amazon also accepts mobi files, but ePub is becoming the standard.
- These are specific and have the ability
For print books:
- Upload a print-ready PDF with the correct trim size (e.g., 6″x9″, 5″x8″) and embedded fonts.
- Your full-wrap cover (front, back, and spine) must also be a high-quality PDF sized to your exact page count.
Before publishing:
- Check your image resolution (300 DPI minimum for print)
- Review margins and bleed settings
- Confirm file sizes are within the platform’s upload limits
Your book formatter should know all of this and provide you with the correct files and what goes with what.
Remember: Always order a printed proof copy before final approval so you’ll catch layout, margin, and paper quality issues that aren’t obvious on screen. Plus, reviewing the proof is one of the fun steps to self-publish a book.
4. Pre-publishing
Yes, before you actually launch your book, there are steps to self-publish a book before that. At least, if you want to set yourself up for success.
Step 10: Build a launch team
One of the best steps to self-publish a book is actually in the building of your launch team. This should be done 1–2 months before launch. The initial momentum of your book sales out of the gate can make or break your success.
Here’s the power of a launch team:
- They leave reviews on launch day.
- Share your book on social media.
- Provide testimonials or quotes.
If you want to get them to take action, offer them incentives: free books, early access, or exclusive content. Creating a group on Facebook is a great way to manage your launch team too.
Step 11: Prepare your marketing strategy
This is one of the steps to self-publish a book that makes most people put off publishing altogether. It can be confusing. But marketing isn’t all that difficult. It just requires learning a new set of skills—but you already did that when you learned to write a book in the first place.
With this, you’ll plan promotions like cover reveals, pre-order bonuses, and teaser graphics. Nothing too excessive.
One of the very best things you can do is to start growing your email list early. It’s still one of the best tools for authors.
This can look like promoting freebies along with your book. Here are a couple examples of what this could look like inside the book itself:


That can make a big difference. But before you publish, here are some essentials to prepare:
- A strong book description (use emotion and reader benefits).
- SEO-optimized keywords and categories on Amazon.
- A simple, author-branded landing page or website isn’t required as one of the steps to self-publish a book but definitely helps..
- Social media presence (focus on platforms where your readers hang out — you don’t have to be everywhere).
5. Self-publishing
This is it! The core of all the steps to self-publish a book. And there are a fair amount of steps. This is what you should keep in mind for it.
Step 12: Publish your book
Triple-check your files before clicking “publish” no matter where you choose to upload. A single formatting issue or typo on your cover can cost you credibility (and sales).
Choose your publishing platforms wisely:
- Amazon Kindle Direct Publishing (KDP)
This is the largest self-publishing platform in the world. If you’re only going to publish in one place, start here.- Ebook + paperback (and hardcover, optionally)
- Access to Kindle Unlimited (if enrolled in KDP Select)
- Fast publishing, global Amazon store reach
- Note: enrolling in KDP Select gives you extra marketing tools but requires 90 days of ebook exclusivity on Amazon
- IngramSpark
Best for wide distribution to libraries, indie bookstores, and academic markets.- Ideal for authors who want their book available in physical bookstores
- Can publish print and ebook
- You’ll need to purchase your own ISBNs in most countries
- Higher upfront costs, but better access to wholesale distribution networks
- Kobo Writing Life, Apple Books, Barnes & Noble Press
Great for going wide and reaching readers who prefer non-Amazon platforms- These platforms allow you to control pricing, distribution, and promotions
- Kobo is especially strong in Canada and Europe
- Apple Books has a large audience of iPhone/iPad users
- Barnes & Noble Press includes access to B&N’s Nook store and print distribution
- Optional aggregator tools (like Draft2Digital or PublishDrive)
These platforms distribute your book to multiple retailers at once — a great time-saver if you want to go wide but don’t want to manage separate accounts for every platform.
You’ll want to set your pricing smartly:
Research pricing in your genre. Search for similar books on Amazon and other stores.
Look at:
- Ebook prices (many genre fiction titles fall between $2.99–$4.99)
- Paperback prices (usually $9.99–$16.99 depending on page count and genre)
- Nonfiction or business books may be priced higher due to perceived value
Use launch pricing strategies to get more upfront sales that can earn you a bestseller banner.
A common approach for pricing is:
- $0.99 or free launch price to gain visibility, reviews, and momentum
- Raise the price after the initial launch window (usually 3–7 days)
- Pair launch pricing with promotional tools like email blasts, newsletter swaps, or Amazon ads
Take into account royalty differences as you choose pricing. Amazon offers 70% royalties on ebooks priced between $2.99–$9.99 (and 35% outside that range), so aim to stay in that sweet spot unless you have a strategy for pricing higher.
Next, order a proof copy:
Always order a physical proof copy of your paperback or hardcover version if you didn’t do so earlier. It’s one of the steps to self-publish a book that makes a huge difference. You’d be surprised what you can catch.
Things like:
- Look for issues with alignment, margin bleed, page numbers, or print quality
- Review paper type and cover finish. Sometimes matte vs. glossy can affect color vibrancy
- Check the spine and back cover layout, especially if your page count changes
After confirming everything looks great in your proof, approve the final version and go live!
Your book is now published! You’ve fulfilled all the actual steps to self-publish a book. But they’re not the only steps. There are a few more to keep in mind if you want to have long-term success. These look more like book marketing—ads, social media, and more. The truth is that the right long-term marketing strategies depends on your goals.
But you should first focus on these steps to self-publish a book before worrying about marketing.
Book Outline Generator
Choose your Fiction or Nonfiction book type below to get your free chapter by chapter outline!
Book Outline Generator
Enter your details below and get your pre-formatted outline in your inbox and start writing today!
CONGRATULATIONS
Thanks for submitting! Check your email for your book outline template.
In the meantime, check out our Book Outline Challenge.


