


Your author website can grow your author platform in amazing ways. Because of this, one of the first, and most important, steps in establishing your author platform and growing a solid readership is to create a professional author website.
When you have a reliable author website, readers will take you more seriously and you can sell more books.
If you have no web design experience, this might be intimidating. After all, you’re a writer and focus on plot structure, not web design. But you’re not alone!
In this article, we’re going to break down all the steps for building an author website, including where to host it, examples of other author websites, and bonus tips.
Author website: what’s covered
- What is an author’s website?
- Guide to building your author website
- Author website examples
- Can I create an author website for free?

What is an author’s website?
An author website is similar to an online resume or portfolio of your work. Your website is just one of those things you have to have for people to know that you’re a professional. If someone googles your name and can’t find a website, that’s a potential sale lost (and big marketing mistake!).
A good website sells books and whatever else you offer. Having a professional place to display everything you offer will help readers and clients find the information they need to make the purchases you need.
If you’re interested in making money, make it easy! Create an attractive website with clear call-to-actions for potential buyers to follow.
Whether you’re selling books, offering services from your author platform, creating content, or a mix of the three, having a strong, clear website with accessible information will ultimately help you make more money.
Now that we know why we need a good author site, how do we do it?
Guide to building your author website
Follow the below steps to build your website from the ground up!
1. Buy a domain
A domain is the URL address of your website. These are not free, so you do have to pay for them, but they’re typically inexpensive unless: you want something that’s taken (and you have to buy it from someone), or it’s deemed “high value.”
In this case, the domain company selling it may make it very expensive. You will have to go through a domain seller in order to buy a domain. But first, you have to choose what your domain will be.
What should I call my author website?
Typically, this is the easiest part.
For most authors, you will buy a domain that’s the same as your public-facing author name, like: HannahLeeKidder.com
If your name is not available (someone else has it), then you can choose a name with a variation like “author” or “books”. Here are some examples of domain names you can choose:
- YourNameAuthor.com
- YourNameBooks.com
- BooksByYourName.com
- AuthorYourName.com
We recommend choosing a name that you can use consistently across all platforms, including social media (meaning, if you use YourNameAuthor.com for your domain, make your social media platforms YourNameAuthor for the username. This will allow readers to find you very easily.)
How to buy an author domain
There are a number of websites you can use to buy a domain.
Among the most popular are:
The choice is ultimately up to you for where to buy—we typically recommend GoDaddy because of the vast supply of step-by-step tutorials available online for all of the following steps (that can get complicated if you’re not tech-savvy).
From there, these are the steps to actually purchase your domain:
- search for your desired domain in the search field of the site you chose
- add the domain to your cart
- go to checkout
- ALWAYS choose to pay for the “keep your information private” option, this will prevent any spam calls and emails and mail
- enter your payment information
- complete checkout
You now own your domain! But the work isn’t done yet. Just because you bought a domain doesn’t mean you can go to that URL and it will appear live. You have to get hosting and choose a platform to hook it all up to next.
2. Choose website hosting
Website hosting is different than your domain or even where you’ll edit your website. Your website hosting is the provider of connecting your platform (like WordPress) to the internet and your domain. You can think of website hosting like the house where your website will live.
There are a ton of website hosting platforms. Again, these are different than the actual platform you’ll use to build your website. Most often, the place you purchase your domain from will offer to connect hosting directly for a certain fee, but you can usually find discounts for hosting elsewhere.
These are some web hosting providers you can use:
- Bluehost (probably the most popular)
- Hostgator
- Hostinger
- WP Engine (most often used with WordPress)
- SiteGround
3. Choose your website platform
This is the place you’ll log into when it comes time to edit your site, its theme, the design, and even where you’ll build your pages. Essentially, it’s the software that holds the content of your website. These are the softwares and database you use to login, edit, and post your content.
Some popular site builder options are:
- WordPress
- Wix
- Weebly
- Squarespace
- ShowIt (advanced and for tech-savvy authors with more budget)
Do a little research and find which option is best for you considering your content, aesthetic, and the level of skill you have in designing a website.
Most authors will use customizable templates, which is a great option for a professional, attractive website without having to dump piles of money on a web designer.
We recommend WordPress as a website platform, as it’s an easy and highly supported platform for those not as technical (including hundreds of helpful articles and tutorials online).
Once you’ve chosen a host, set up your pages and content.
4. Connect your hosting and your platform
This is typically done through the website where you buy your domain and set up hosting. Usually, steps 1-4 here are done in the same place to keep it easy for building an author website.
If you use GoDaddy to purchase your domain, these are the steps for setting up your website, platform, and hosting:
- Login and navigate to your profile icon
- Click it and select “my products” from the dropdown
- Scroll down to where you see “My Domains”
- Click on the domain you bought (it will say “Not Setup” on the tile)
- Click “Use My Domain” that appears toward the top of the page
- Choose the option that best fits your need (if you’re using WordPress, select “Build a more advanced website with WordPress” to connect it directly)
- If you chose the WordPress option, hit “Create Site” on the next page
- This will lead you to a page that will ask you to choose a theme or design
- If you hit “Use default WordPress,” you can create a login that will allow you to enter the backend of WordPress
- Choose the country you reside in (or where your customers will come from)
- Let your website be built and follow the rest of the steps below
5. Know your audience
Before we move on to what to include on your author website, you also have to keep in mind that your audience will dictate things like the theme, pages, design, and even the types of content you’ll put on your website.
You also want to keep your own author goals in mind here, too. Why? Because you’re building a site for the now and for the future version of you as an author.
For example, if you intend to write fantasy novels with a ton of characters, or maybe even an extended book series, it may make sense for your author website to have a page dedicated to “characters.”
However, if you’re writing a nonfiction book, you may have a blog about that content that leads readers to buy your book. Your audience will also dictate the colors, design, and author branding you decide to go with.
The best way to know your target audience is to go to the places they spend time (online or in person), and learn what they like and don’t like.
6. Pick a theme and design
Most website platforms have a ton of designs you can choose from and then edit. We recommend WordPress for this because of the vast amount of free design templates you can choose.
In order to change your website’s theme in WordPress, follow these steps:
- Login
- Navigate to your dashboard
- On the left side, find “Appearance” and hover
- Click and choose “Theme” from the menu that displays
- Click “Add new theme”
- Choose a theme from the options (check if you can change colors, layouts, and more)
If you’re a more advanced user of technology, you can pair WordPress with a design-heavy software like ShowIt to create stunning websites with a “drag and drop” builder without a grid.
For a design like this, it’s overly customizable (though they do have free themes to choose from as well), so make sure you have an eye for design. If you don’t, you can always hire a website designer.
Below is an example of a future-author’s website that uses WordPress for the blog hosting and ShowIt for the design and appearance.

7. Add the necessary pages of an author website
Websites should be built to accomplish whatever your specific platform and sales goals are, but here are a few things you’ll usually find on author sites to give you some ideas. Take what makes sense, leave what doesn’t!
Homepage
Your homepage can be as simple as your author photo and name, or you can do something like I did where you scroll through my books and end on a little summary of the other content I create.
Other authors utilize their homepage for the latest release, so the entire homepage is dedicated to their newest book and where to buy it.
Poke around some of your favorite authors’ websites and see the different strategies! Which style works best for you and your brand?
Homepage of an author website example:

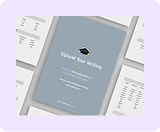
“About Me” page
Who are you? Let us know! An about page should have your author headshot (or stand-in logo, if your face isn’t connected with your platform), a little bio to make you personable, and your social links.
You can see how I created my about page here with just a headshot and a bit of copy. You can also use more neural tones and colors, like this about page uses.
A page for your books
It’s good to have a comprehensive list of your books or publications on your author site. You can include books that are already released, as well as books that are available for presale.
Each of my book’s pages have reviews, buy links to several sites in several formats, and a brief preview of the audiobook. You might include something like a first chapter download or an embedded book trailer to spark some interest!
Book page of author website example:


Upcoming projects pages
This is a good place to “soft announce” your works in progress. Even if you’re not loudly promoting those projects yet, it’s nice for fans to have a look at what you’re working on.
TIP: Consider using stand-in titles (like “Fantasy Novel” or “Farmcore Romance Series”) and stand-in book covers before you’ve properly revealed the finals. Announcements like titles and cover reveals are a great opportunity to get some hype for your books, so don’t let anything slip prematurely!
DOUBLE TIP: Consider using early access reveals to your newsletter as incentive for people to sign up.
You can check out an example of my “Projects” page here to get an idea for what stand-in titles and covers can look like.
Services pages
If you offer services (like a lot of indie authors do), you might compile them into one page on your website.
For example, I have a page listing all of my services in one place, then shoot-off pages with more information for each one.
Author website services page example:

Contact page
Have a way for people to reach out! This could be an in-website contact form or a list of your contact information. Be sure to keep these updated, and don’t forget to link your active socials!
Reviews and testimonials page
If you offer services, it’s great to have past customers say a few nice things for future customers to feel more comfortable hiring you. As an author, this is also a great place to post reviews on your books.
You might manually insert a few significant reviews, or use a plugin or widget to have a live feed of GoodReads reviews or Amazon reviews.
I like to incorporate reviews and testimonials in the relevant sections (like with the book pages I showed you earlier), so these different categories don’t necessarily have to be their own separate pages.
Mailing list page
Mailing lists are an extremely important tool in an author’s workshop and a crucial piece of any good marketing campaign. You can use your website to grow your mailing list!
You might have a pop-up mailing list prompt, but it’s also a good idea to have an easy-access sign-up page. That way, you can link people toward it, and they can find it on purpose in case their browser settings don’t allow the pop-up to come through.
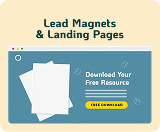
Shop/affiliates page
There are a few ways to monetize your author platform outside of selling books, and two of those are merchandise and affiliate links. I sell some of my own merch on my website, but I also utilize my blog, newsletter, and other parts of the platform to stream in affiliate income.
Do you have any ideas for monetizing your website outside of book sales? Let us know in a comment!
Blog
The most common content creation for an author (outside of their books) is their blog! Blog posts and articles are a great way to produce quick-turnaround content to draw in new readers and to monetize your site.
You might blog about writing, life, business, or anything else that holds your interest and draws in readers or customers. I double-dip with the content I produce for YouTube, turning those scripts into blogs to post on my website.
Think about blog topics that might draw in your target readership!
Frequently asked questions page
You also might include a page for Frequently Asked Questions to let clients and readers find information without having to contact you personally.
TIP: Every page should have some kind of lead. Whether it’s a buy link, a direction to another page, a signup form—each page of your site should funnel your potential readers and clients somewhere else to keep them on your site as long as possible.
The longer visitors spend on your site and the more they do during that stay, the more Google will favor your site in the search engine.
Author website examples
With those possible pages listed above, your author site can be as simple or as thorough as you’d like! Let’s look at a few examples of different author sites. For a classic one, take a look at Tomi Adeyemi’s author website.

She hits the essentials of an author website:
- Author photo, brief bio
- The books
- Contact form
- Book reviews
- Services
- Speaking
She clearly shows she’s an author, while also giving viewers the option to enroll in her writing curriculum, book her for speaking, and even view her model work.
Here is a good breakdown of an author website menu:
- Homepage
- Book page for each book
- Shop
- Services
- With an additional page for each service
- About
- Connect
As you can see, you can include as little or as much information as makes sense for your platform and brand.
If you don’t have a book out yet, you can follow the example of this future-author’s website and simply include a Services, About, Blog, and Contact page. Later, you can add a book page for each book.

Can I create an author website for free?
Author sites can range from free to thousands of dollars. You might put together a free website through a service like Wix or Weebly, then not have a custom domain.
That means your site URL would be something like: hannahleekidder.com/wixsite or, if through WordPress, it will be hannahleekidder.wordpress.com. This isn’t the most professional option, so I highly recommend at least buying a custom domain.
A site with a custom domain would run you around $20 a year for the domain alone, plus about $5-$10 per month for hosting, for a total of around $150 per year.
Remember: If you are a more advanced author with more website visitors per month, then your hosting will cost more because you pay for the amount of data your server will use from the hosting provider.
The thousands of dollar options come into play when you hire a web designer to code your website from scratch. This is not necessary to have a professional website, so don’t sweat it if you don’t want to drop that kind of money.
I paid for a template, had a developer friend customize a couple bits of code for me, and now I just pay for my domain every year, which can range from $10-$20 for the whole year.
All-in-all, I’ve paid well under $500 to keep my website updated and live for several years. My website makes more than that every month, so the investment is more than worth it.
As you can see, the cost varies a lot based on your preferences and skill level, so do some research and see which options are best for your budget and goals.
Author website: take your first step
Like any project or endeavor, building an author site should start with making a list. Let’s brainstorm specifics of how you should build your website.
To start on your author website, try answering these questions:
- Who is your ideal user? Describe one specific person that your site is for. Their demographics, interests, problems, strengths and weaknesses, etc.
- What do you want your site to accomplish? Do you want to grow a readership, convert sales, attract new clients?
- What would attract, and keep, your ideal user? For example, if your main goal is to grow your mailing list, how are you attracting your target demographic? Do you have a sign-up incentive that might appeal to them? Is the website designed in a way your ideal user would find appealing?
After you answer those three questions, you should have a pretty solid idea of which direction to take your website.
Need help? Check out the ways we can help you sell more books!