


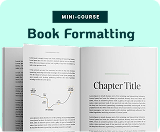


While the story you write is a huge contributor to your author success, did you know your book format plays a tremendous role as well? Your book’s formatting is a crucial part of your readers’ experience. An unprofessional book layout will both distract readers and make you look like an amateur.
We’ve taught over 8,000 authors how to write, publish, and market their books over the last 10 years. One of the key aspects we focus on with our students is their book format!
There are many benefits to self-publishing your book: creative control, timeline to publication, royalty rates, and more. However, one downfall of the self-published author is a messy manuscript.
That’s why we’re taking you through the five book format tips you need to know to publish your book in a professional manner.


Book Outline Generator
Choose your Fiction or Nonfiction book type below to get your free chapter by chapter outline!
Book Outline Generator
Enter your details below and get your pre-formatted outline in your inbox and start writing today!
CONGRATULATIONS
Thanks for submitting! Check your email for your book outline template.
In the meantime, check out our Book Outline Challenge.

Book format: what’s covered
What is book format?
The term book format can refer to a variety of manuscript formats, including the layout of pages, book dimensions, and yes, how the copy appears on the page.
When working with authors, this is a crucial part of my editing process. Not only do I need to ensure their manuscript is written in the best way possible, but I edit their formatting to make it ready for typesetting and publication.
So, when an author comes to me requesting edits, I make sure to explain that part of the book editing process includes editing their book format as well. If you can understand book format before publishing your book, you’ll be leaps and bounds ahead of other authors.
With that in mind, in this article, you’re going to learn some of the most common book formatting errors that come across my desk, as well as how to fix them using Microsoft Word.
What is the format for a book?
A book format is it’s physical appearance (dimensions), how the chapters are laid out, and how the copy is communicated on the page. In regards to how you portray your on-page copy, there are five key book format rules to follow when formatting your book.
Adherence to these book format rules will help you communicate your professionalism as an author and make for an easier read for your audience. The proper format for your book depends on the genre you write.
But regardless of whether you write fiction or nonfiction, you should focus on five aspects:
- Avoiding hard indents
- Choosing automatic indents or block paragraphs
- Cutting double spaces
- Use of hyphens
- Deciding on quotes or apostrophes
These are major areas to consider because they make up a large portion of the format of your book.
What is the most common book format?
With the above in mind, it’s time to look at the most common, industry-standard book format (which does not include double spaces!). Let’s get into the five tips.
1. Avoid hard indents
A hard indent is when paragraph indentations are created by manually using the keyboard’s Tab key. Many of us learned how to type using the Tab key to create an indent at the start of each paragraph, so this can be a tough habit to break.
However, when it comes to your book format, use of the Tab key is a no-no. One reason for this is because it creates an indent that’s far larger than you need. But secondly, when your book goes to be typeset, if you have not used Style Panes in Microsoft Word, your typesetter will have quite a bit of work ahead.
When I take a manuscript through what I call the “last pass” before it goes to the publisher, use of the Tab key is one aspect I look for.
But is there a variance between the book formatting for fiction versus nonfiction? Yes!
- For fiction you want to have just a small indent at the start of each paragraph
- For non-fiction, generally speaking, you want to use block paragraphs rather than indents (unless your book is a memoir or historical fiction)
How to create paragraphs without the Tab key: in Microsoft Word, set the Paragraph settings to automatically create indentations for the first line in each paragraph (industry standard varies between .25″ or .5″).
This simple auto fix will make your book formatting process way easier, as well as make your typesetter happy! But what if you already drafted your 535-page tome using the Tab key? No need to set fire to your laptop or comb through every paragraph by hand!
Here’s what to do to clean it up:
- Use the Advanced Find and Replace
- Enter ^t in the Find (This will help you find every “Tab” in the document.)
- Leave the Replace field blank.
- Hit Replace All.
Just like that, you already fixed your first book formatting error!
2. Choose indentation or block paragraphs
While some traditional publishers may choose a different format, works of non-fiction typically don’t use indentation. Rather, a popular format for modern non-fiction books is the block paragraph.
What’s a block paragraph? A block paragraph doesn’t have indentation on the opening line, but instead uses a horizontal line of white space beneath each paragraph. This helps to delineate separation between paragraphs and is exactly how this blog is written.
The reasoning behind indentation versus block paragraphs is for flow of thought: in works where one thought should flow smoothly into the next, such as in a novel, paragraph indentations are used with no line spacing between paragraphs.
However, in books where readers consume complicated information, creating a single line space between paragraphs aids the brain in processing one piece of information before moving on to the next.
An exception to the block paragraph for non-fiction and indents for fiction guideline is non-fiction narrative (such as memoir or historical fiction). These genres can use the same indent style described in tip number 1.
3. Cut double spaces after periods
When I open an author’s Word document and see it riddled with double spaces, I quickly fix it to adhere to today’s style guide. What’s wrong with double spaces?
Just as with the good old-fashioned Tab key indent, two spaces after a period may have been the norm back when you were learning to type. This is because with typewriters, characters were all the same width, so the two-space rule allowed for greater readability.
With modern computer fonts, the characters all fit closer together in proportional fashion, thereby eradicating the need for that one additional space.
Most major style guides—including the The Chicago Manual of Style, which is used by traditional publishers and the publisher I edit for—formally recognize the modern, single-space rule. From an aesthetics angle, one space looks neater, which your readers’ eyes will appreciate.
If you’re editing your manuscript, be sure to change all double spaces to single spaces. The result will be a better formatted, stylistically correct book.
You’re going to use that super handy “Advanced Find and Replace” function again:
- Enter two spaces in the Find (this will help you find every double space in the document)
- Enter a single space into the Replace field.
- Hit, Replace All.
Just like that, you’re out of the typewriter age and into the the age of PCs and Macs.
4. Use hyphens with caution
Improper hyphenation is a common error that’s difficult to avoid. Why? The rules of hyphenation depend on the grammatical situation as well as the style guide you use.
Generally, keep these three rules in mind while you write to stay on top of your hyphens:
- Compound words, which are two words that are joined together to make a single word, do not require a hyphen. For example, toothbrush or starfish.
- Two or more words that, together, function as an adjective are joined with a hyphen. For example: dark-pink skirt or two-way street.
- Two words or more that form a number are joined with a hyphen. For example: twenty-one.
When in doubt, look it up! I’ve been editing for years, yet I still look up hyphenation at times to ensure I’m up to date with the latest grammar and style guide rules. For a more detailed treatment of the hyphen, here is an important source to consider: Elements of Style.
5. Know when to use quotes versus an apostrophe
Few things scream “new writer” like punctuation errors. I don’t at all mind working with debut authors and helping them fix their mistakes (that’s my job!), but it’s important that they don’t take these mistakes to print when they publish their book.
You want to make sure you’re using quotes and apostrophes correctly so you don’t lose credibility with your readers. Below are a few quick rules of thumb.
Use of quotes
- When you’re quoting someone, use quotes! This means either a person is speaking—like in fiction—or you are borrowing material verbatim from another source, like in non-fiction.
- Use of quotes is rarely needed for common expressions.
- Ironic terms can be set off in quotes.
- Overuse of quotes is frowned on, so use minimally.
Use of apostrophes
- Use an apostrophe for possessive form (exception: the word its). For example: The cat’s toys are blue.
- Use an apostrophe for contractions. For example: The cat’s playing with its toys. It’s a happy cat.
- Avoid using an apostrophe for plural forms. For example: Five cats ran past her.
Again, the rules can be complicated such as when to use an apostrophe when dealing with an acronym, so when in doubt, look it up.
Book format: take your next step today
Don’t let book formatting or grammar errors hamper your book’s professional entrance into the world! You have all the tools you need to produce a flawless manuscript.
Now, take the time to review your book—and hire an editor—to ensure your book formatting meets current style guide expectations. To help you get started, take your next step today by using our free Book Outline Generator below!
This blog was rewritten from the original version, published by Chandler Bolt.
Book Outline Generator
Choose your Fiction or Nonfiction book type below to get your free chapter by chapter outline!
Book Outline Generator
Enter your details below and get your pre-formatted outline in your inbox and start writing today!
CONGRATULATIONS
Thanks for submitting! Check your email for your book outline template.
In the meantime, check out our Book Outline Challenge.