


Learning how to write a book chapter is key to the success of your book. If you have a killer book idea and you’ve gone through the mind mapping and outlining processes, it’s time to write your chapters.
Of course, the actual writing is the hardest part for non-experienced writers. In this blog, we’re going to explain how to write a book chapter so you can make the writing aspect of self-publishing a breeze.
We’re going to show you how to write a good chapter. While my tips are targeted at non-fiction authors, they can also be executed for fiction.


Book Outline Generator
Choose your Fiction or Nonfiction book type below to get your free chapter by chapter outline!
Book Outline Generator
Enter your details below and get your pre-formatted outline in your inbox and start writing today!
CONGRATULATIONS
Thanks for submitting! Check your email for your book outline template.
In the meantime, check out our Book Outline Challenge.

How to write a book chapter: what’s covered
- Why do you need good chapters?
- How to write a book chapter for beginners?
- How do I start a chapter in a book?
- What is the structure of a book chapter?
Why do you need good chapters?
You need good chapters because they give your book structure. Without them, it’s hard to keep your thoughts organized. This should be pretty obvious, but it’s always good to start with the basics.
Chapters are necessary because they help us stay with our main point/story idea, and if we have chapters in our book, obviously we want them to be good. Good chapters will lead to a good and even great book.
With that, there are three main steps for how to write a book chapter:
- Follow your mind map and outline
- Stay on one point until reaching a finished thought, then move to the next
- Complete a thorough self-edit
Follow these three main steps, and you will be well on your way to learning how to write a book chapter. Repeat the process, and you will have a very good manuscript you can self-publish on Amazon!
How to write a book chapter for beginners?
The best step for learning how to write a book chapter for beginners is to start with your mind map and your book outline, mentioned briefly above.
Follow your mind map and outline
There’s a reason why we first teach students to mind map and outline their book before ever beginning the rough draft. Mind mapping creates a roadmap for your book. Constructing an outline connects those roads and essentially gives them names.
Here’s the beginning of the outline for my first book, His World Never Dies: The Evolution of James Bond.

If done correctly, the book structure emerges from the mind map and outline. Once you mind map and outline, you have content to work from as you learn how to write a book chapter.
Once complete, it’s time to put those ideas on the page in the form of a rough draft. The mind map and outline ensure that each idea fits into the best chapter.
As important as the next step is to write a good chapter (staying with one topic within a chapter before moving to the next), it’s even more vital that there aren’t any loose thoughts or ideas that belong in a different section of the book. Good outlines can prevent this from happening.
Cover one topic per chapter
This step is most critical for rookie writers. Less experienced writers have a tendency to bounce back and forth between ideas. That’s not a recipe for success (beta readers will point this out to you!).
When beginning your rough draft, make sure you complete your thoughts, writing down every concept you may have before moving on to what’s next.
Learning how to write a book chapter is similar to mind mapping. During that step, you should have written down every thought you could conceive of for every general idea, which will eventually become all of your chapters. Writing works the same way.
Don’t put a limit to how many paragraphs you need for an idea. Write as many (or few) paragraphs as you need to convey your point. Of course, you could reach a point of redundancy, but that’s all right in the rough draft process.
It’s easier to cut than it is to add. Just make sure to stay on point and transition smoothly from one idea to the next. You can use conjunctive adverbs such as however, but, although, even though, despite, moreover, furthermore, etc., to help you transition.
Here’s a more extensive list of conjunctive adverbs:

However, (see what I did there) keep conjunctive adverbs to a minimal. If you use them constantly, it’s going to seem like you are contradicting every single point you make.
Tip: If you are still having trouble bouncing back and forth between numerous ideas, it might be best to break that chapter down into multiple chapters. We’ll dive into an example later.
Complete a thorough self-edit before submitting to an editor
After finishing the rough draft, it’s going to be very tempting to immediately send the manuscript to an editor. But it’s not ready.
The last major step to writing a good chapter is self-editing that chapter. You’re in luck because I also wrote a post on self-editing. Please refer to that post for more details, but essentially, the self-edit process helps you double-check all your work.
In the self-editing phase, you will complete several different verbal read-throughs, ensuring that each chapter stayed on point with no loose ideas that actually belong in a different section of the book. This is a major aspect of learning how to write a book chapter.
Yes, you should also catch grammar and spelling mistakes while self-editing, but checking for chapter structure is arguably more critical. Any decent editor will be able to catch grammar or spelling errors.
It will take a more advanced editor to provide advice on paragraph order and chapter structure. Through self-editing, you can also trim any of the redundancies that you may have made while originally writing your rough draft.
How to write a book chapter: example
When I wrote my first book, His World Never Dies: The Evolution of James Bond, my first chapter was a bit of a mess during my rough draft phase. That’s because I tried to tackle too many ideas at once.
During the outlining phase, it seemed natural to explore the popularity of the James Bond film series and how the series’ portrayal of masculinity has changed over the years, all in the same chapter. Bond’s masculinity is a major reason why so many men and women have loved the series over the last six decades or so.
But during my self-edit, it felt as though I was bouncing between these two ideas: Bond’s popularity and masculinity. The chapter felt clunky and long. What’s worse, it was the first chapter of my book. I couldn’t have my audience believing my first chapter was too long and confusing.
Therefore, I decided to break that first chapter into two. That helped me stay focused on one idea and led to a very successful first two chapters in my book. Ultimately, it taught me how to write a book chapter and do so successfully.
How do I start a chapter in a book?
Whether you write fiction or nonfiction, start a chapter by focusing on a singular idea. So far through this blog, we’ve focused on writing a good chapter for non-fiction books. Fiction is a little different.
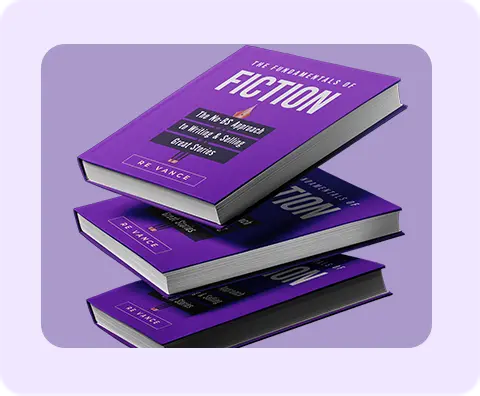
Rather than forming arguments or making points, fiction authors tell a story. When learning how to write a book chapter for fiction, keep the story at the forefront of your process. For more information on constructing fiction books, please refer to this training by expert R.E. Vance.
To get you started, though, you can use these same basic concepts to learn how to write a book chapter for fiction. Remember, following your mind map/outline and self-editing are key for both fiction and non-fiction.
The middle step is the biggest difference, but the essential premise of the step is the same. Keep your key story elements together and ensure to tell the story in order (unless it’s portrayed in some unusual flashbacks).
How to write a book chapter for fiction authors:
- Keep paragraphs on the short end
- Limit chapters to 3,000-4,000 words
- Every good chapter could use a good title
These last three aspects can take a good chapter and make it great.
What is the structure of a book chapter?
The structure of your book chapter will vary from writer to writer and genre to genre, but a good rule of thumb is to keep paragraphs short and chapters within a specific word count.
How many lines is a good paragraph?
Shorter paragraphs keep readers reader. While this is really style preference, for me, shorter paragraphs and chapters are better. Millennial readers don’t like big bulky paragraphs. How do I know? Well, I’m one of them.
Books are a little different, but with web writing, short paragraphs are essential because it’s easier to skim, which is often all readers have time to do.
This can apply to books in the digital age because so many people now read eBooks. Shorter paragraphs look more appealing and less daunting on an electronic screen. We don’t want to encourage people to skim your book. However, if there’s ever a question of, “Should I make this one paragraph or two?” make is two!
How many pages is a book chapter?
This all depends on your creative choice, but it’s helpful to keep your chapter-length under control. Remember when you were a kid, and you were reading a really long book for English class? What was the very first thing you did before reading a chapter?
If you are anything like me, the first thing you did was count how many pages you needed to read to get to the next chapter. It was so painful when that next chapter was 20, 25, or even 30 pages away.
Nobody wants to pause a book in the middle of a chapter. Longer chapters could mean a long time until getting a break. Now, that doesn’t mean we want to give our readers opportunities to stop reading. But similar to shorter paragraphs, shorter chapters will make the reader feel more accomplished.
If someone asked me if I would rather read a 200-page, 10-chapter book, or 200-page 20-chapter book, I’d definitely pick the latter. For a slow reader like me, it will make me feel like I’m reading through the book faster, thus making it a more enjoyable experience.
Tip: Keep in mind that these style choices won’t matter if the content isn’t good. If you have nice short paragraphs and chapters but your chapter doesn’t make any sense or bounces between too many ideas, the reader will stop reading.
Name your chapters
The very last thing to a good chapter is a title. When I say the very last thing, it’s the very last thing, and it’s not even necessary all the time. This is completely optional!
Don’t get caught up in what to call the chapter before writing it. Often, it’s going to change anyway. If you follow your mind map and outline, you should have an idea of what each chapter is about, but there are alterations made during the writing process.
Just like in journalism, I rarely give my sports stories a name before writing them. If I did that, I’d spend the entire time writing to the title. Write about what you want to write. Make the points you wish. Then decide on a title that fits what you just wrote—if you even want one. They aren’t necessary but can be a nice added feature.
How to write a book chapter: start today!
Obviously, we all want to write good chapters. That leads to a good manuscript and then a good/great book. Following these steps, you can get to the point where you are writing good chapters with ease.
If you’re ready to start, finish, and publish your book, we can help. Use our free Book Outline Generator and start writing your chapters today!
Book Outline Generator
Choose your Fiction or Nonfiction book type below to get your free chapter by chapter outline!
Book Outline Generator
Enter your details below and get your pre-formatted outline in your inbox and start writing today!
CONGRATULATIONS
Thanks for submitting! Check your email for your book outline template.
In the meantime, check out our Book Outline Challenge.